
In the first of what I hope to be many of its kind, here is a step-by-step (mostly) process of how I make pizza.
First of all, you have to make some dough. I've been using the simple "Artisan Bread in 5 minutes" method. Take a plastic food-grade bucket (about 1.25 gallons, or 6 quarts) and add:
1.5 tablespoons of kosher salt
3 cups of warm water (around 85 degrees, or slightly warm to the touch)
1.5 tablespoons of yeast (it'll work with less too... It will just take longer to rise)
Slosh that around to get it mixed up, then add 6.5 cups of white flour. Don't pack the flour down or anything, just scoop it up and level it off with a knife.
Now mix it up with a big spoon until there's no dry spots of flour. Put the lid on the bucket, with a small gap so it can breathe a little. Let it sit on the counter for a couple hours, then put it in the fridge (for up to 2 weeks).
(I'll take more photos of this process in the future. That was the short version)
Now you're ready to make your pizza! The whole process takes less than an hour. First you need a bunch of counter space.

(Right around now is when you should turn on your oven too. 500 degrees, which is just about as hot as my oven goes. Put a baking stone on the lowest rack.)
Take out a handful of your dough. It'll be a really wet dough, so feel free to sprinkle liberally with more flour.

Form it quickly into a ball by stretching the dough across the top and folding it underneath. This should only take about 20 seconds. Put flour on the surface if you need to, but you don't need to work it in, or knead the dough at all. That's why this method is so great!

Start spreading out the dough, working your way out from the center. You want to be gentle, and be sure to avoid the edges. There are little air bubbles in the dough, and when it goes into the oven, they'll puff up and make the crust all nice and light and awesome. Don't mess with the edges, or it will end up flat and yucky. Nobody wants that.

Then, put down the camera so you can use both hands to stretch it out even more. There's all sorts of techniques to doing this efficiently, but I don't know any of them. Just fake it, and keep adding flour if it gets too sticky. Flip it over a lot too. That makes you look all professional. (Even more so if you get flour all over your shirt)
Eventually, you'll end up with something about 12" in diameter.

Which you then put on your pizza peel. I have a "SuperPeel", which I got as a present from my awesome friend Rachael. Now you're ready to start putting on the toppings! Put down a nice layer of cornmeal under the dough, or else it will stick to the peel. That would be bad. I've done that before, and it's not pretty.

Pretty much anything goes here, but I usually start with some tomato sauce (from a jar, because I'm totally lazy. Something not too chunky or anything) and some chopped olives, and dried oregano (so it tastes like I made my own sauce).

Then the cheese. Lots of it. This isn't enough, but will do for now. (use low-moisture stuff, or you will get a pool of liquid on your pizza when it cooks)

For the toppings, I cooked up some diced chicken thighs (two small boneless thighs), because that's what Angie likes.
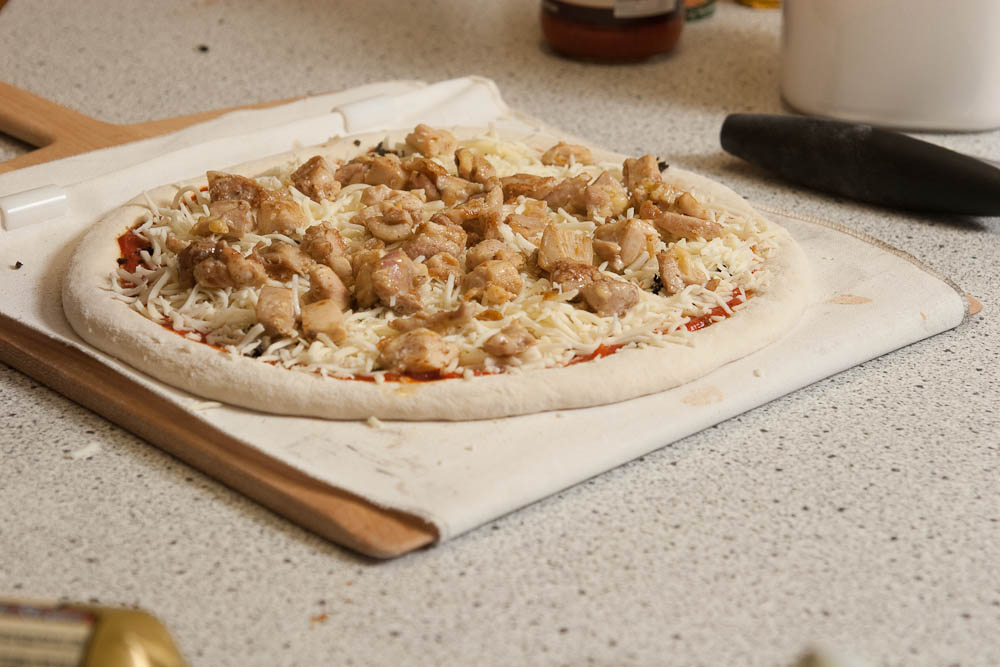
I also put some chunks of ground sausage on one half, because more meat is always better.

Slide it into the oven carefully. If you don't have a superpeel, be even more careful. You might have to do the "tablecloth" trick and yank it out from under the pizza real fast. If you didn't put enough cornmeal under the dough, this is where you're going to pay for it.

About ten minutes later, pull it out of the oven. It should look like this, all nice and bubbly and browned on top.

Eat it with a nice salad that your wife made, and you have a healthy meal! Yum!
 |
| Look at the great bubbles in the crust. If you squished it too much when shaping, you won't see those. |